Friday, April 26, 2013

Fabrication 


When I removed the stator cover I damaged the gasket on that side of the bottom end. I have orderd replacements for both gaskets left and right. The damaged gasket resulted in a pretty significant oil leak at the point of damage.  I removed the stater cover again and replaced the gasket there. 

 
Notice bare areas where gasket broke loose.

 
 There was some scraping involved as the old gasket has hardened and adhered to the casing. Once I had a good clean mating surface it was pretty simple to replace the casing. Bottom end oil leak seems to be corrected.  In the photo below you will notice the bolts sticking in a piece of cardboard.  The bolts are all different and this procedure helps me get them back in the correct holes.


Below you will see an outline of my expenditures so far.

Project cost so far:
LS650  Purchase--------$500.00
Clymers Manual --------$54.00
Starter--------------------$149.00
bottom end gasket kit---$19.00
Steel Stock Lowe's-------$28.00
MotorMounts Ebay------$21.00...............Total $771.00

     One item of the steel stock I bought at Lowe's was a 12" X 24" sheet of 22 gauge rolled steel.  This will be strong enough to hold the battery and I can cut it with a large pair of sheers.  I used the same process that I showed in an earlier post when I made the pattern.  The pictures below show the semi completed box.  The holes are for mounting and locating the rectifier and starter solenoid.  I will need to weld the front corners for added strength but it will suffice as is for fitment on the bike.


    The first item that became glaringly obvious was that the negative battery lead would not reach the batter in it's original location.  I was able to solve this problem by moving the lead to the left rear motor mount and reusing one of the bolts for the old battery box to connect it.
 
 
      The leads to the battery connected.  By locating the starter solenoid on the bottom of the box it was easy to route the positive lead.
 

Lots of wires!

 
That is a little better.  Good not great.

 
    I am going to fess up here, I borrowed the locations as well as the basic design for this box from pictures and videos on other sites to modify the Suzuki Savage.  Some things are different and I did modify some aspects for ease of manufacture.   When I cut the battery box I used the entire 24" length of the 22 g steel.  this allowed me to extend the rear section further up between the frame.  My intention was to use this as a kind of fender over the rear wheel.  In the photo below you can see this will be a great place to locate the electronic ignition box.  You can also see the mounting location for the rectifier and the starter solenoid. 


    This is the bike running in the new configuration.  Click on the highlighted youtube link.  For a bike that is 27 years old I am pretty pleased so far.  I still have a small oil leak on the valve cover but there is no smoke and the moter seems to run fairly smoothly.
 

<iframe width="480" height="360" src="http://www.youtube.com/embed/H6jFKJOept8" frameborder="0" allowfullscreen></iframe>
 
Below is a new acquisition for the shop.  I will have to remove the front forks at some point and this little lift I picked up on Craigslist should be just the ticket. 

 
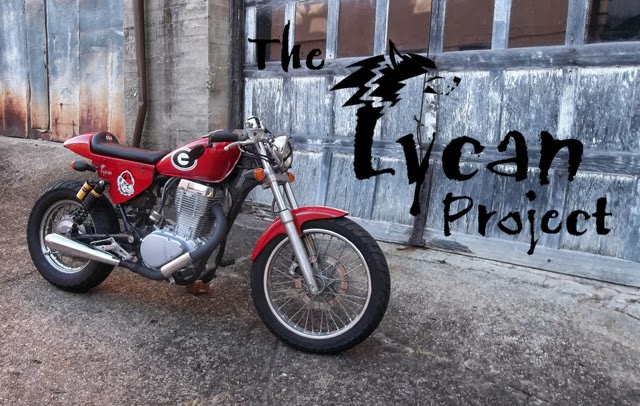
In the real world I dabble in Screen Printing and Embroidery as one of our side businesses.  Below is the logo I worked up for a shirt and cap.  I can now look like such a PRO when I am working on the bike.  Go ahead laugh.  As Billy Crystal said, "It is better to look good than to be good!" 
Good is a relative term.


Wednesday, April 24, 2013

Electrical Trouble Shooting.


    I had mentioned in the last post I had to order a new starter.  It arrived yesterday and I installed it.  I had received advice on the Suzuki Savage forum to remove or disconnect all non necessary electrical draws and start from there.  (aka... all lights)


           With the new starter installed I was able to fire the bike up and get it to a steady idle.  I then unplugged the stator from the rectifier and checked the voltage across all three poles.  With the bike at idle the meter read 46 volts AC on all three wires.  I then reved the bike up to around 5000 rpm and the voltage meter showed 110 volts AC.


  This is the correct reading for the stator.  With the continuity check I performed earlier and this I have concluded that the stator is OK.  I then unplugged the rectifier from the system and plugged the stator back into it.  After switching the meter to DC the readings coming out of the rectifer were inconclusive, (at least to me they were) so I plugged it back into the system.  I took the voltage meter and switched it to DC and checked the battery voltage with the bike at idle.  The reading was 13.00 volts at idle and at 5000 rpm it read 14.7 volts.  This is also the correct reading.  With the bike off the battery registers 12.6 volts between the positive and negative poles. 


  I am convinced that the battery and the charging system are OK at this point.   The lights were a little strange when I got the bike.  The rear turn indicators had been literally torn off and the front turn indicators would not flash.  They just glowed brighter when the switch was deployed.  Based on the wiring I think the indicators serve two purposes running lights and turn indicators.  I have a newer set I removed from a 2007 GS500F I had a couple of years ago, these are turn indicators only.  When these are plugged in the turn indicators work properly and the flashers also work. 

    I am thinking at this point that the electrical problems on the bike were due to direct grounds in the lighting system and the bare wire between the starter solenoid and the starter.  If this is the case, as it appears, I may be very close to having the electrical system sorted out.


Tuesday, April 16, 2013

More planning..........


Unfortunately the starter is not going to be repairable.   I will have to source it online somewhere.  In the mean time I have been tinkering with some of the body parts.  The frame for the seat pan is going to be  fairly straight forward.  I do not want to cut down the tank as  I plan to use the existing tank mount point and the top rear fender mounts.  This will allow me to not cut the frame and result in a fairly relaxed riding position.   With a mock seat on the frame assembly pictured the stand over is 30 inches and in a seated position my knee bend is right at 90 degrees.  I simulated the foot peg location with wood blocks and had a friend measure my knee bend.   The frame assembly in the pictures is aluminium and is just to get the correct measurements.    I plan to use round steel tubing when I fabricate the actual piece and have a rounded rear end.  I have Styrofoam blocks that I plan to use to make a form to mold the fiberglass seat cowl.   I also plan to cut down the original seat pan to form a narrower seat.  This whole assembly will have a slight forward angle to help create a secure seating position. 

 
Alignment with stock tank mounts.


Rear fender mount points.

 
Slight forward angle.
 
      When I removed the kick stand from the forward control mount I discovered that the bolt size and thread pattern are the same as the rear engine mount through bolt.  By reversing the bolt I was able to mount the kick stand on the bike in a rear location.  I will have to work out some way to stabilize this mounting that will also allow me to mount the spring.    The kits use a similar cross bracket to mount the foot peg.
 
 
I have also began patterning the Battery box.  I use pattern paper to get the correct starting point.


After I use the pattern paper to form for the shape and fit it in the bike I use valley tin to test shape and mounting. 


Forming on the end of table with yard stick and hammer.

 
Placement in frame with battery and seat fame. 
 
 
     I will have to make this box out of steel plate for strength.  I am planning to mount the rectifier, starter solenoid, and electronic control box to it as well.  this should give me a good idea  size and fitment.


      Patterns for the rear sets mounting brackets.  Not sure yet if I am going to use aluminium or steel here.  I like the aluminium idea but 3/8" aluminium or 1/8" steel, from what I have read aluminium needs to be 3 times as thick to give me the same strength.   I am not a small guy so strength is important. 

Friday, April 12, 2013

Electrical Issues?

Electrical Issues?

      I have issues!  With the bike's electrical system, my issues are a totally different subject all together.  I was aware of the electrical issue when I purchased the bike so this really isn't any surprise.  My issues do tend to be a surprise for some people, hell they surprise me sometimes.
     One of my issues is that I tend to make assumptions that are sometimes unfounded in anything other than what I want to be true.  I know, they call that fantasy.  In this case I assumed that a wiring harness for a 1986 LS650 would be the same as a wiring harness for a 2004 LS650.  This turned out to be ...wait for it......fantasy.   This point being made, if anybody needs an 04 wiring harness contact me.  I'll let it go cheap!
     The previous owner told me the bike needed a stater, not starter but stater.  I proceeded to check all the things I could externally as explained in the manual.  I didn't have any answers from this procedure so I decided to crack things open and remove the stator cover and stater.


        Everything looks pretty good considering the age of the bike and the outer appearance.  The test described in the manual all show a reading for a good stater.  The only option here is to throw some money at it and start swapping parts.  Not likely.
 
          I will make a point here that I can not stress enough, "If you have a motorcycle go to the appropriate forum for you bike and poke around.  Ask questions, be humble and learn a few things."  Most bikes have a forum specific to that bike and there are a lot of folks with a lot of knowledge, more than willing to share.  If you are having a problem with your bike do a search you may find the answer there.   Read some of the post and notice who is replying to them.  There always seems to be one or two guys that are kind of the gurus of these forums and really know what they are talking about.   I have saved thousands of dollars on my other bikes by simply asking questions.  Somebody has already had your problem and can usually tell you how to fix it, where to get the parts, and maybe even direct you to a how to website.   That bit of knowledge is what really gave me the courage to tackle this project. This leads me to the Savage forum.  
     The guys there suggested I check the stator with the motor running so that meant some partial reassembly, aka reconnect the wiring harness.  That is when I found out the 04 wiring harness was not going to work.  Once again if anybody needs one let me know.  This was actually much quicker and faster than I had expected as there is really only one way to connect things and they are pretty much color coded. 
 

This looks like a rats nest but not so much.  Really!
 
     Once everything was connected and the fuel supply was restored I tried the starter.... nothing.  Checked the connections and hit it again...... nothing.  I thought back to the last time I had started the bike before I began disassembling it and remembered a little puff of smoke from the starter wire.  I removed the starter and found it would not turn.  I then removed the ends and found that the starter was totally fried.


Maybe charred is a better word.
 
     Tracing back I found a bare spot on the starter wire that might possibly be my problem, at least where the starter is concerned. 
 
 
      Fortunately there is a local shop that repairs starters and alternators so I took the starter and the starter solenoid there to have them repaired and checked.  When I get these parts back I will try again and track this problem down.  Maybe I will work on a few other items while I wait.  Check back soon.


Thursday, April 11, 2013

The Take Down!

    
     This is not what I would consider fun.  Rusty, greasy, frozen bolts are a pain, and years of neglect make the process drudgery.  With every piece that comes off the excitement builds. 

 
Tank and seat first.

                                        Chain guard, battery and carburetor.

 
Breather box.


Chain guard, drive pulleys, rear fender, wiring harness, cables, exhaust,
 front control sets and rear wheel.


Lets set the tank back on and simulate the fabrication for the rear end and seat pan.
 
 
Yard stick to check seat height.

 
Stand over height should be around 29 to 30 inches.  Perfect!
 
 
A little cut and paste with Photo Shop and this may just work. 
I guess the next step is to sort out the oil leaks and the electrical system.  Then I will need to fabricate the seat pan and mounting frame.  Then the rear foot controls.  My plan as of now is to work my way to an operable motorcycle in the above configuration then worry about the cosmetics.

Tuesday, April 9, 2013

What were you thinking? 


 Nah! Not gonna happen.

       I guess we all have times when we face buyers remorse.  I sit and look at the bike and think, " What were you thinking?  You gave $500 dollars for this piece of crap!"
The left foot peg is a piece of rusty metal wedged into the bracket with a piece of black electrical tape.    The rear passenger foot peg is a 1/4 inch drive socket wedged onto the bolt.  You can't make stuff like this up!


 In it's defense it doesn't smoke when it is running.  The previous owner told me it needed a stator and apparently it does.  I can charged the battery overnight and it will crank and idle very well with no smoke but the battery runs down pretty quickly and that is that.  I did this procedure a couple of times to make sure I could repeat it.  Once the bike would not crank and I noticed a little puff of smoke from the wire going to the starter.  I let it set a minute and it cranked up fairly quickly.  It may be the compression release solenoid not sure.  I do not have any voltage running to the battery when the bike is running so I am pretty sure the stator is bad.  Transmission shifts through all four gears and the clutch seems to function well.  There is oil all over the engine cases so I am assuming I will need to replace the gaskets.   That is not a big deal as I had planned to tear the engine part of the way down anyway.  No leaks on floor under bike though.
      

The building I am using for this project was originally a De Soto / Plymouth Dealer back in the late 20's through the early 40's. The section I am using was the repair shop. Hardwood floors over a full basement. You would not believe the timbers under this floor. Metal tiles on a 18 foot ceiling. There is still a steel I-beam mounted to the ceiling where the motor chain hoist was attached. The building has been used for quite a few things over the years, a sewing plant, a leather shop, an awning shop, automobile storage, and just plain storage. You can tell from some of the pictures that storage is a loose term at best. 
But it cleans up pretty well for my purposes, and it is quite well lit. 


Re purposing of an old work rail from the sewing operation and a ramp makes a great bike work stand.  Just the right height to sit in an old office chair while I wrench.


Well enough buyers remorse, I'm energized again.  Now let's tear this baby APART.