Tuesday, April 1, 2014

The Transformation!

     Over the years I have learned quite a few skills.  In my business I've been forced at least to try a lot of different things.   Most of those skills have been self taught. So I guess I shouldn't be too surprised that I have a been able to sort of pick up this motorcycle mechanic thing.  The phrase "It ain't rocket science!" really does apply here.
       One of the things I have learned in life is that if you don't know the answer there is usually someone who does.  This has been reinforced during this process.  I mentioned in an earlier post that the forums would be invaluable during this project.  That was the best decision I made.  Humble yourself and ask, be respectful of others, and grateful for good advice.   I have discovered that in this age there is probably a forum for anything you want to do.  This build has given me the confidence to tackle an even more daunting project.  Namely replacing the clutch in my BMW R1100RT.
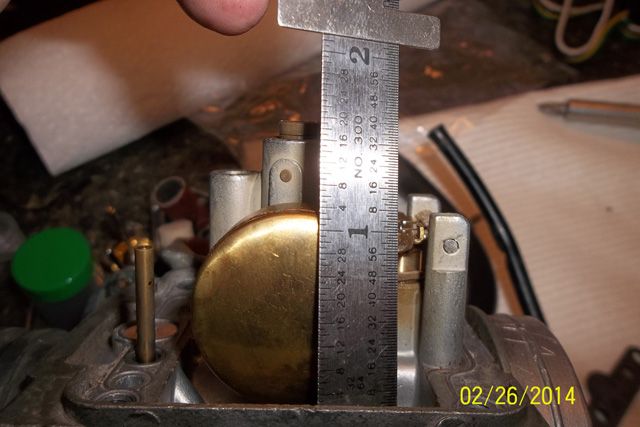
       Through the forums I found videos of the process and manuals for the same.  Check list that outlined the process step by step.  These items were offered to me for free.  All I had to do was ask and I received.  Armed with this knowledge and a friend to help I jumped in.  There are 105 photos of the procedure but I'll just show you the Readers Digest Condensed book Version.
 
Strapping the patient to the operating table.
 
 
Carefully piece by piece.
 

Finally the clutch.


8 hours later it was pretty scary.
 
 
Reassembly. 

 
Lubed gear box input shaft.

 
The gear box back in place.  What a nightmare.

 
Not as bad as I thought.


16 hours later good as new!

 
I would also like to thank my friend Bob.  His help was invaluable.
 
 
Here we are back on the road in the North Georgia Mountains. 
It was smoother than silk.
 
 
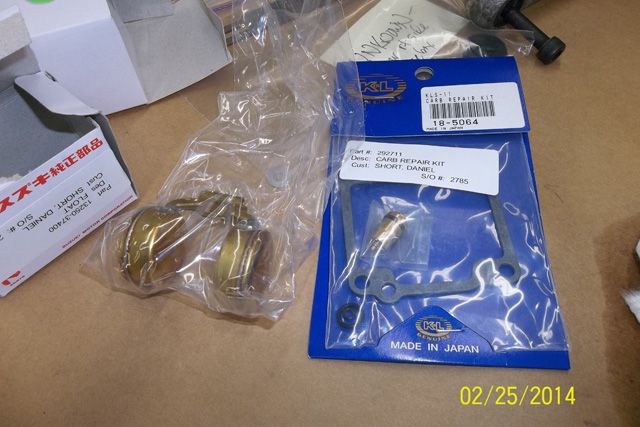
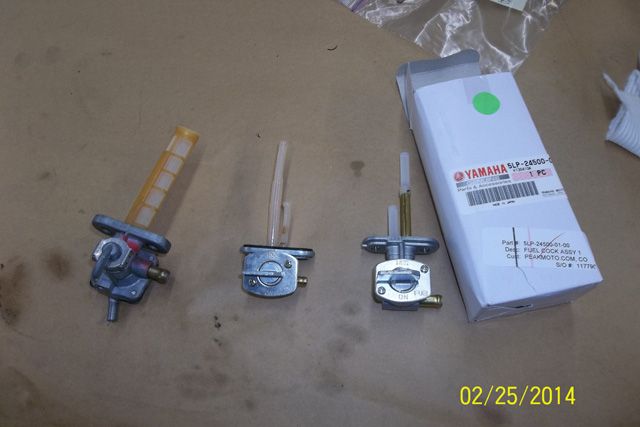
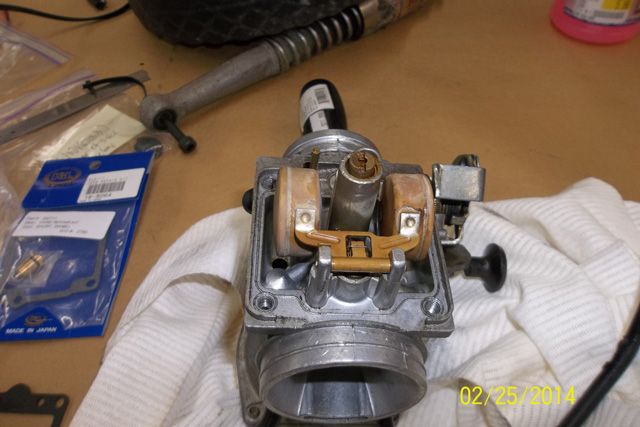
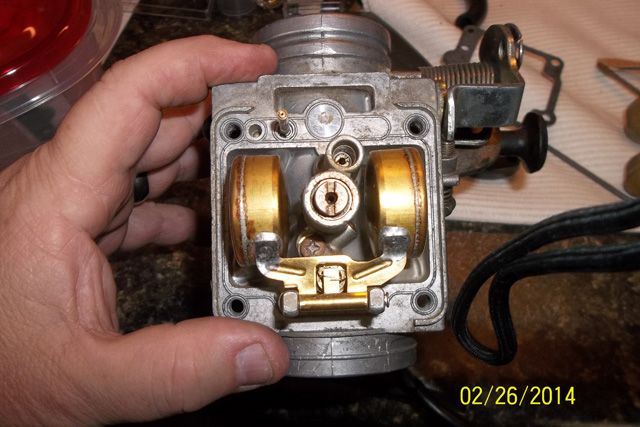
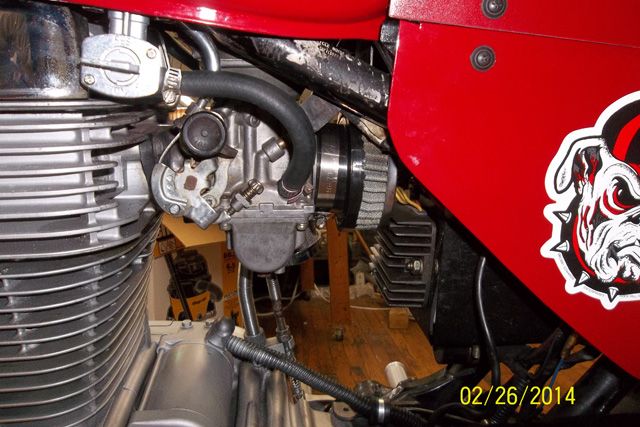
     It has also lead me to undertake a few other more menial task. I had a 1980's Snapper mower that had served me well over the years.  Last winter it started hemorrhaging fuel.  ETHANOL!  This spring I went to a local small engine shop and purchased a $4.50 carburetor kit for the 8 hp Tecumseh motor.  Then I purchased a $12 starter solenoid from the local hardware and it was good as new.  A couple of weeks on Craigs List and I had $350 in my pocket and space in the garage. 
     My regular mower, a 18.5 hp Craftsman lawn tractor had always been hard to start.  I had to move it to work on the bikes one day and I noticed an oil leak on to the muffler in the front, not to mention the motor would not turn over and start.  This oil leak just happened to be under the valve cover on the engine.  I removed the valve cover and cleaned it and checked the gasket.  I also noticed the valves seemed loose.  I took the time to check a few sources on the net and watch a few YouTube videos of the process.  The valves were out of tolerance, especially the exhaust valve.  Once they were properly adjusted and everything buttoned back up the engine cranked easily.  Apparently the exhaust valve was not opening properly and this made the engine to tight for the starter to turn over.  Once adjusted the engine started easier and ran more smoothly.  I even mowed the lawn for the first time this year to check it out. 
     Obviously I was quite pleased with myself.  I recycled a non running piece of equipment into cash and saved what could have been a $200 repair on the other lawn mower.  So I figure I am about $550 to the good there.  I performed a clutch replacement on the BMW and a front wheel bearing replacement as well.  The estimates on the clutch replacement ran from $900 to $2300, and the front wheel bearing replacement about $400.  That averages out to around $2000.  The parts ran $250 for the clutch and $86 for the front wheel, so $1664 to the good! 
        There are resources out there to help you figure out most basic repairs, even some that are not so basic.   A key element is having the proper tools.  I needed a few tools to repair the clutch that I didn't have.  A 30 mm socket , a 14 mm hex key, and a torque wrench that would do 150 NM, about $75 total.  The front wheel required a bearing puller that I found at Harbour Freight for $18.  I look at each of these as investments, even $300 for the motorcycle lift was an investment.   So $400 to save $2200, that's pretty good economics. 
    I also have the knowledge of knowing the condition of the piece of equipment I was working on.    Every time I repair something I have a better understanding of that item.  I understand how it does what I ask it to do.  I have worked on industrial sewing equipment over the years in my business.  Early on I was told how important it was to keep the machines properly oiled.  The phrase "that's the life of the machine", was repeated to me over and over through the years by my father.  That makes more sense all the time.  Proper maintenance is directly related to the life of any piece of equipment, be it a sewing machine, lawn mower, or motorcycle.
      The title of this blog was a reference to the transformation of a motorcycle.   A transformation from a mild mannered cruiser, that had out lived it's useful life, into a beast that sent chills down the spine of all that saw it.  The motorcycle turned out far better than I ever dreamed.  I smile every time I walk by it in my garage.  It's a real point of pride to ride it somewhere and come out to see 3 or 4 people standing around it, or have complete strangers feel compelled to ask questions.  The smiles of people I meet or the thumbs up I get from time to time are still gratifying.  It's not the beast I had hoped for but that is due to the limitations of the 1986 technology sitting at its heart.  It looks pretty damn good though.
     What I had not really counted on was the transformation of myself during this process.  Sure I hoped to learn more about motorcycles and how they worked but it's more than that.  At fifty I have found I can still learn new skills.  I can change the way I look at things and how I interact with my surroundings.  I can expand my horizons and change my world.  The transformation is only over when we stop challenging ourselves.  There is a quote that I put on all my emails that has come to have new meaning for me.
 

"Only those who will risk going too far can possibly find out how far one can go."                                                                       -- T.S. Eliot

 
So challenge yourself today and go just a little farther outside your comfort zone than yesterday.  I'm going to.
 

Monday, March 17, 2014

The Pilgrimage!

    I made a few short local rides and the fuel leak seemed to be resolved.  Saturday looked like the only good weather day I had for the coming weekend.  So that looked like the day for my pilgrimage to the hallowed ground that inspired this bike, Athens, Georgia and the University of Georgia.  I spent a few years there back in the early 80's and quite a few fall Saturday afternoons since.  It is about 120 miles round trip but I really wanted to get a few pictures in some of the spots that resonate with the feelings this bike inspires.  I changed the batteries in my camera and forgot to set the date it was actually 03/15/2014. 

  The first stop was the fabled Arches!  After my graduation I would make it a point to walk through them every Saturday before any home game.  It is tradition that you should be a graduate to walk through The Arches, Class of '83.  I just considered it to be good luck. 
 
 
On the bridge at Sanford Stadium.

 
The G Mosaic by the Letterman's Club.  Across the street is the bank and the railroad tracks where students used to gather to watch games.  This tradition came to an end when the east end of the stadium was enclosed in the early 80's.  My first year there I used to walk to campus through the Oconne Cemetary just across the tracks.

 
The entrance to the Butts - Mehre Building.

 
The Vince Dooley National Championship Memorial, a cast bronze masterpiece. 
Well I think so.

 
The Coliseum.

 
Two more photos at Sanford Stadium.


       After the photo tour I went to my favorite BBQ place in Athens, Pulaski Heights Bar-B-Que.  Its off Prince Avenue on Pulaski Street.  It's a little Bohemian area of town that appeals to me.   You can either eat inside or outside by the tracks.  If you look out the front window you can see a block over where the old Athens Depot used to be.  That location was also where T. K. Hardy's used to be.  It was a popular bar in the 70's and became infamous when one of the owners killed the other in the late 70's. 

 
Pulled Pork sandwich, Brunswick Stew, macaroni and cheese, and baked beans. I highly recommend PHBBQ!

 
      I have a cousin who is somewhat of a wine aficionado and she tells me there is a nice wine shop in the same complex that has wine tastings on Saturday, Shiraz is the name.  Another friend also told me that the artist who cast the bronze Dooley statue above has his studio in that area as well.  Its an interesting part of town that is off the beaten track.  
      While I was eating a 20 something young woman came in with a young man of about the same age. Noticing my helmet on the table, she smiled and commented her approval of the bike setting out side. We talked a few moments and she showed me a photo of a bike on her phone, a really cool 250 Cafe bike that she had built.  I voiced my approval as well.  It still thrills me the range of people that you can connect with, just by having a motorcycle. A 20 something woman with her life in front of her and a 50 plus guy with a lot of his behind him, shared a common experience and understood each other for just a moment. Motorcycles give me hope and faith in my fellow human beings. Two people with nothing else in common knew something about each other that made them kindred spirits.    Regardless of what you ride, cruiser, sport bike, touring bike, dirt bike, cafĂ© whatever it is; you get past the outward personas that we all try to project and find we all just love the freedom you find on a motorcycle.  That is a good thing. 
     When I started writing this the term “Pilgrimage” was a little tongue and cheek.  Through the writing I have discovered how apt that term was.  I traveled a long distance to a place that held great meaning and personal significance to me.  In the process I made a discovery about myself and my fellow man that hopefully will make me a better person to those around me.   That is a very good thing.


Sunday, March 16, 2014

"That ain't the answer I was looking for!"

   I guess that it is a telling factor that most of my mechanical quotes are from Robert Duvall in "Days of Thunder."  The most recent was when I walked into the shop and there was a puddle of fuel under the bike again.  I immediately thought of Robert talking to the race car before the Daytona 500 and finding an oil puddle on the floor and he said, "that ain't the answer I was looking for!"  Me either!  Then I walked around the bike and shook it as I looked into the oil sight glass.  Fuel in the crank case again.  Obviously my carb repair a few weeks ago was not as successful as I had thought.  First things first draining the oil again and removing the carb and fuel tank.
Through some discussion with my brethren on the forums I decided that #1 my new petcock was faulty and not shutting off the fuel supply, #2 the fuel supply valve was faulty, and #3 possibly the float was also defective.  So I ordered a carb kit and float from a local dealer.


Next I ordered a new genuine Raptor petcock.  Apparently the great deal I got before was no so great.  Below you see from left to right, the OEM, cheap knock off , and Raptor from Yamaha.


In take valve parts.


New verses old. If you look closely you will see the wear on the older part on the right.


New valve seat installed.


I had trouble fitting the new float so I reinstalled the old, but it still leaked.


Using my rotary tool I was able to make the new float fit perfectly by slightly trimming the tab where it attached between the mounting post. 


 Setting the float to the proper height is very important.


The new petcock installed and the carb reinstalled.


Its going to take a few test rides to see if this solved the problem.


Tuesday, February 25, 2014

Throttle, Cable, Controls, and the Brake System.

I decided this was the time to replace the throttle cable.  It had a couple of cracks in the housing and some rust.  The controls on the handle bar were pretty ruff as well.  So I thought I would clean them up also.


I sanded the surfaces down used compressed air and blew all the trash out from years of neglect. 


Next I taped them off and touched up the buttons with a little paint.  Not perfect but better.


When I removed the throttle tube from the control housing it was at best a stop gap item that had been heavily modified.


I purchased a new one on ebay for cheap.

 
Upon reassembly I discovered why the original was so heavily modified.   Somewhere over the years Suzuki had changed the insides of the controls.  With a little trial and error and the grinder and dremmel I was able to get a much more accurate fit. 


I also took the time to adjust the decompression unit on the head.  A lot of these units have failed on older bikes.  What this does is open the exhaust valve for just a moment during starting.  This takes  pressure of the cylinder and makes starting easier on the starter.   I followed the trail in the Clymers Manual and did the proper test on all components.  Everything seems to be opperating properly.  After adjusting the cable I cranked the bike and watched the decompression lever move as it should.  Success!!

I have never been very happy with the front brakes on this bike.  The real issue is the fact that it is a single disk with a single piston caliper.  I feel sure that the hose and caliper were original equipment, aka 28 years old.  I had replaced the master cylinder with a 2005 unit earlier and have noticed a leak at the caliper.  I purchased a 2006 caliper from ebay and a new brake line from the dealer.  First I drained the system from the master cylinder with a syringe.


Then I removed the caliper and drained the system at the lower end into a bucket.   I leaned the bike over by adjusting the tie downs to get the master cylinder as level as possible.  This would help when I refilled the system as well as with contamination on the lower end.   I was careful to cover all areas with shop towels as brake fluid is corrosive.


Reassembly with the replacement parts.  I made an effort to clean the areas as well as possible.  Looks pretty nice.


Refilling the system is a time consuming operation.  Air is not your friend and getting all of it out takes awhile, one bubble at a time.   As the system is now you pressurize the system and hold the lever in, open the bleeder to allow the fluid and air out, then close the bleeder.  Only after you have closed the bleeder can you release the brake lever.  Releasing the lever with the bleeder open will suck air and dispelled fluid back into the system.   This is complcated on this bike by the fact that the lever and the caliper are on opposite sides of the bike.  You pretty much have to give it a reach around.  Ha!  It takes a good while to get the system to begin to presurize.  It seemed like 15 miniutes that I was not accomplishing anything.  Once it does it is pretty much straight forward.  Speed bleeders make this a much easier operation. I will order one for this bike.  I will let the bike set for a couple of days and let any additional air settle.  Then bleed them again.  Gee, I'm turning into quite the mechanic!


Tuesday, February 4, 2014

Oil Leak


Oil on the left hand side of the head.  This is the sign of of the oil cap leak on the S40.  The cap covers a hole that allows access to one of the cylinder head bolts.
 
 
Location of the oil leak. I actually took this picture after I had replaced the valve cover. Notice the red line of Permatex. It's the sure sign of an amateur mechanic.

 
Valve cover removal.

 
More card board and a drawing.

 
The engine was in neutral and I was very careful not tho turn the engine over during this procedure.

 
The old Cap filled with oil and some old sealant on and around it.

 
Valve rocker arms. Checked for any lost motion on the rocker arms.  Everything seemed pretty tight.

 
 The old one seemed to be OK but the new one is much more robust.

 
Permetex High Temp Silicone gasket maker.  Lots of opinions online about what is best.  We will just have to see how long this last.

 
A nice bead of sealant.

 
Insert and press.  I did a little clean up around the cup with a q-tip to make things a little neater than this picture shows.

 
A very thin coating of Permatex on the surface of the valve cover.  I don't think there was much if any sealant on this when I removed it. 

 
Torqued to spec.

 
After removing the drive pulley I removed the collar on the output shaft.


Remove the old seal.

 
New seal and replace the collar.

 
Retaining ring and bolts.

 
I also checked the valves after installing the cam chain tensioner I mentioned in the last post.  The gap is supposed to be between .08 mm and .13 mm.  All four of mine were .10 mm so I left well enough alone.  For those not familiar with this procedure.  I first inserted a .08 mm feeler gauge which slid in without any problem.  Then I tried a .13 mm feeler gauge and it would not slip into the opening.  I next tried a .10 mm gauge which would slip in but seemed to be fairly tight.  This was the same on all four valves.  Sorry I didn't take pictures but I was kind of excited that everything was in tolerance and didn't need adjusting.  Seriously, I think it might be the first time I didn't need to perform a major procedure after any check on this bike.  Things are looking up!
 
While I was waiting on parts I tacked a few other things as well.  New throttle tube and a new throttle cable.  I 'll cover that next time.