Tuesday, February 4, 2014

Cam Chains and the Oil Drain.

I had said I needed to change the oil after the gas leak so this seemed like a good time to check the cam chain tensioner.    Removing the right side crank case cover is several bolts and they are all different lengths.


So after draining the oil I removed the cover.  To make sure I get the bolts back in the proper holes I use an old piece of cardboard and make a drawing of the layout and punch holes with a screw driver at the screw locations.


Looks pretty good inside.


The wear point on the tensioner is 18 mm,  Mine was 21 mm!

 
After reviewing my options, Cam chain replacement $120 for a new chain and tear the motor apart and re time.  Modified tensioner from the Savage forum $170, or send mine to California and have it modified, $75.  We're shipping to California.

 
In less than 2 weeks I have a modified cam chain tensioner!  Pretty nice work.


Installed and torqued.  The hardest part of this whole repair was removing and replacing the circlip that anchors the tensioner to the case.  Really tedious, on and off!

 
Now pull out the zip tie and see what we have.
Pretty slick actually.

 
One of the first things I did when I got the bike was to change the oil.  Not the filter but the oil.  I rode it a while then changed it again.  Since the gas leak I have ran the bike in the shop hoping to let the oil and gas mixture clean the sludge out of the engine.  Oil filter change and fresh oil. 

 
Old filter yuck!

 
New filter.

 
Button things up.

 
While I waited on the modified tensioner to arrive I decided to tackle a few others issues that had been plaguing me.  I have had a couple of oil leaks that I tackled and that will be in the next post.  Transmission seals and the dreaded
"Cylinder Head Plug Leak"! So tune in next time for more photos and a light nontechnical description.


Friday, January 17, 2014

Shop updates and a couple of product reviews.

      After the disaster with the RT I decided I needed some form of assistance to get bikes on and off the lift.  The first attempt was the out rigger you see below.  While this seemed practical it was not very useful for the same reason as the kickstand.  The apex of the ramp onto the lift.


Mounted on the Special.


A friend suggested I build some extensions for the lift in the lowered position.


The ramps allow me to ride the bike onto the lift and back it off the same way.
I have a video but nobody wants to see my butt for that long.  I cut a slot in the left hand addition to allow for the pedals.  Once the bike is secured I simply use the handles to lift one end and slide them out of the way.  Stacked they make a nice height little bench.


      The wheel chock on the Harbor Freight lift is less than satisfactory.  I replaced it with this model also available from HF.  I also added two eye bolts to the end to allow for an additional point to secure a bike.  As far as my opinion of the HF lift goes for the home user or hobbyist it is the way to go.  The choc is not very good but affordable and easy to upgrade. The deck is not as sturdy as I would like and there is some flexing when you are raising the bike but once raised this is not noticeable.  The raised lip on the deck is a nice feature as you don't have to worry about tools and parts falling off while you work.  It also serves as a great adjustable height work table for other projects. The choc is easily removable with 4 bolts.  With the choc removed the lift is low profile enough to leave in place and simply drive most cars over in your home garage, not some sports cars or cars with low profile tires though.  I have a friend that bought a shop grade air lift that is much more heavily built but with shipping cost 4 times what I paid for the HF lift at my local store.  For the money it is hard to beat.  I have a repair coming up on the RT that I could not do without the lift.  This one job will pay for the lift 2 times over.  Not to mention the peace of mind knowing 
what was done and how it was done.


I needed a jack so my solution was a WalMart 1.5 ton scissor jack.  $29.00 at the local store.  I added an aluminium plate to the top with two bolts.  I will use a small 1X6 on top for the RT so the screw heads will not place undue stress on the case.


A $25 gift certificate to Lowes prompted me to organize my tool box.  This system has 1/4", 3/8", and 1/2 inch studs to store the sockets.  There is a foldable handle that allows me to lift the whole group out. 


Pliers.


Wrenches. Pretty professional, HUH?


Another item I have worked on over the holidays is a controller for my heated jacket.  Most controllers are $80 and up.  I tried a rheostat configuration from parts I bought at Radio Shack.  It smoked out pretty quick.  I read on one of the forums about a DC motor controller on ebay.  This unit came with the case and was listed as a
"DC motor speed control, 30 amp, 9-28 volt, Max 800w."  Price shipped from China, $23.99!  I also ordered a First Gear coax extension from Amazon for $11.  I also added an LED from Radio Shack to allow me to see if it is on.  Works really great.  Only drawback is that it is not water proof.


In an earlier post I mentioned adding heated grips to the RT.  One of my Christmas presents was a pair of Lee Parks PCI Deer Tour gloves.  The deer hide is super soft and literally fits like a glove.  The pci option has a space age liner that picks up the heat from the grips and spreads it around your hands.  This seems to work great.  On a recent 33 degree ride my hands were toasty warm.  The PCI material called "phase change" is supposed to work in warm weather as well, dissipating the heat from your hands.  This supposedly gives you a range from  40 to 70 degrees where these gloves are comfortable.  The low end can be extended even further with heated grips. At $140 their not cheap but the quality is without question and they can extend beyond the motorcycle as they're not bulky and look like a pair of nice leather dress gloves.  There is also a repair option if they are ever damaged but the deer skin has a higher abrasion rating than cowhide.   I first heard about these on The Pace Motorcycle Podcast.  One of the guys there said he used these in the winter time and the regular unlined version ($89) the rest of the year. I may have to invest in a pair of these as well. These things get two thumbs up from me for winter riding.


Tuesday, December 17, 2013

Carb and Fuel line Woes on the Special!

     My bike has been on the lift for a few weeks while I had surgery. I was in the shop last week and went to remove it from the lift and gas poured from the air filter.    Replaced the petcock a couple of months ago with the stock unit I found on line as new old stock. Vacuum line was dry when I removed the carb. The old petcock was leaking. I had changed the jets in the carb a couple of times to see if I could get improved performance but the bike is an 86, little different from the norm. Problem started after last attempt. Leak is with the bike sitting upright on the lift and strapped down and has not been cranked in a couple of weeks. I had the bike either on the lift or on jack stands for 2 months to work on my kick stand setup.

Doesn't take log to strip it down now.
 

  After some discussion with the guys on the Savage Forum I replaced the petcock with a raptor petcock closed of the vacuum port with a cap.


OEM Petcock that I installed a few weeks ago.


After draining the tank I removed the two bolts holding the petcock in place.

 
Slid the old petcock out.
 
 
New Raptor petcock.  Ordered this off of ebay and had it the next day. 
$9.25 and free shipping!
Turns out the vendor was in Macon, GA.
 
 
Reverse procedure, slide in........
 
 
Replace bolts. 


3/8's vacuum cap.
 
 
Slipped onto the vacuum line port to seal it off.
 
 
Reinstalled.
 
 
New fuel line.
 
 
After reassembling I turned on the fuel and cranked the bike.   Same leak but worse.
 
 Then I removed the float, float valve needle, and the needle valve body. There was a little debris on the screen in the body. I cleaned it checked the o ring and reinstalled.  


Magnifier I picked up at the Dollar Store.  Great for reading the imprints on jets.


Then I put some fuel in a cup and checked the float to make sure it wasn't leaking. It seemed to be fine as did the tip on the needle valve. I put all this back together and placed a shot section of fuel line I had left over on the fuel port.


    I proceeded to blow air through the valve while I gently closed the valve with the float. Then I slightly bent the tang on the float arm until it seemed to seal properly. I reassembled the the carb and reinstalled it.


 Turning on the fuel the leak seemed to be corrected. I went ahead and started the bike and let it run a little. Seems to have solved the problem. I may have inadvertently bent the tang down when I was fooling with the carb jetting.
   I will have to change the oil and the oil filter but I needed to do that anyway. I probably have some fuel in the crank case due to the extent of the fuel leak.   I also have a new set of gaskets for the bike because there are a few leaks on the engine. I really need to tackle that. The first time may be pretty slow. The bike being an 86 needs a lot of attention. Cables, housings, brake lines, and so forth. Little things like this teach you so much if you take the time to work through them. 


Monday, December 16, 2013

The Road to Recovery

     Well it's been six weeks since surgery.  The doctor said it was worse than expected and I have about a 4 inch scar.   The torn tendons have been repaired and the bone spurs removed.  When I had the other shoulder repaired in 2009 it took six months to recover, it's been 6 weeks and I am probably 80% recovered.  I am amazed at how well it is going.  Counting my blessings. 
     During the down time I have been able to  work on the bikes a little.  Probably a lot more than I should have.  One Saturday around lunch I was heading into the shop and I noticed a BMW pulling into the restaurant across the street.  I went over and took a look and was surprised to find a 1973 R75/5 in truly beautiful condition.  I went in and had a long talk with the owner about his bike while he ate lunch.  It turns out that we had met before at Riders Hill, he had been checking out the Special on one of my trips there.  Really a cool bike.  I would love to cafe one of these.


 After he left I went to the shop and cranked the bikes to let them run.  The Suzuki was fine but when I cranked the BMW I smelled gas.  There was a pretty significant fuel leak under the right throttle body.  It was impossible to ascertain the cause with all the fairings on the bike.  The BMW was due for a 66,000 mile service so I had a friend help me swap the bikes and put the BMW on the lift.  He was not prepared for the weight and let the bike tip over when he was taking it off the center stand.  No harm done but I almost had a heart attack.  We got it on the lift and I began to work on the bike by removing the fairings.  Once that was done I started the bike to evaluate the fuel leak.  WTF!  Miraculously the fuel leak had disappeared and no amount of wiggling or pulling on the fuel lines could recreate it.  I tightened every fuel connection and after several hours threw up my hands.  I don't know if I had a clogged injector and a loose fuel line and the tip over unclogged the injector or what but it's not leaking now.  I had been having some problems with high speed acceleration and I was wondering if it might be a worn clutch but the clutch seems to be OK and there does not appear to be any oil leaks onto the clutch.  Some of the forums have suggested it might be an internal fuel leak in the tank.  The last time I rode the bike I smelled fuel at start-up and it ran really ruff but it seemed to straighten itself out.  It may have been a loose fuel line connection, but I won't know until I can ride the bike again so I will complete the service.
Stripped down the RT is not a very pretty machine.


 I purchased a video inspection scope recently and it was a big help on this project.  I needed to turn the rear wheel with the bike in gear to get the motor to top dead center to adjust the valves.  I could not use my left arm but this allowed me to go to the other side of the bike, use my right arm.  Really cool and it has so many uses.


      Over the next several weeks I changed the oil, changed the transmission gear oil, changed the final drive gear oil, replaced the air filter, checked the valves, replaced the spark plugs, repaired a stripped valve cover bolt with a HeliCoil.  I had never done this before and it was a little scary to say the least.  Taking a drill to the heads on a BMW motorcycle!  Really pretty simple.

Drilling out the damaged threads.
Tapping the drilled hole for the HeliCoil.


Inserting the HeliCoil with the insertion tool. 


New threads and a perfect repair. 


     OH yea, heated grips!  I figure it will either be late December or early January before I can ride so the heated grips will be nice.  My Holiday gift request is a pair of Lee Parks PCI gloves.  They have a material inside that is supposed to take the heat from your grips and spread it around your hand.  The R1100RT has a cool little feature that allows you to direct the air flowing over the oil cooler onto your hands.  I have always thought it would be nice to find a way to direct this air flow into my jacket.  Now that would be a heater.


Service and repairs completed. 


I took the time to go with a few friends to the AIM Show in Atlanta.

Old classics restored!


The new water cooled R1200GS.
This is the lowered package, my 29 inch inseam can flat foot it!
OOOOOOhhh, what you can get for $18,000!


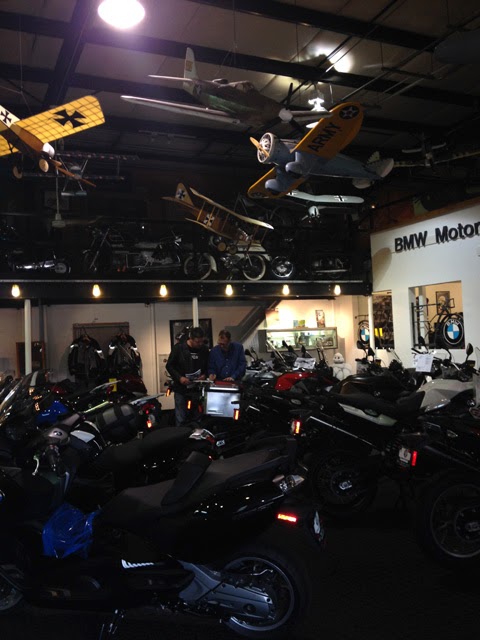
After the show we had lunch and then went by Blue Moon Cycles in Norcross, GA.


The main level is the sales floor with lots of new and used bikes.

The upstairs area is where the magic is. 

Harley Davidson XA.  Made for the military during the North Africa Campaign in World War II.  Only 42 were made.  a Harley with a Boxer engine.


Rare Lambretta Scooter.


This bike was picked in Italy by Frank and Mike on the American Pickers TV Show.


     The BMW has what is called floating front disk.  The steel disk are mounted to the mounting brackets with 12 aluminum bobbins that allow the disk to move slightly on the horizontal plane white remaining static on the vertical plane.  Mine were worn allowing movement on both planes so I replaced them while the bike was in the shop. 


Next time I will turn my attention to the special.  It has developed a few problems as well, sitting in the shop.  How the hell does that happen?   All this happened around Thanksgiving.  So here's hoping everyone had a great holiday.